
&
Medieval Lectern
|
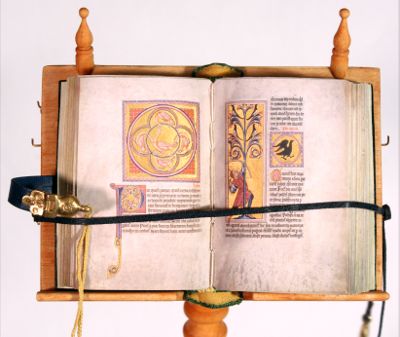
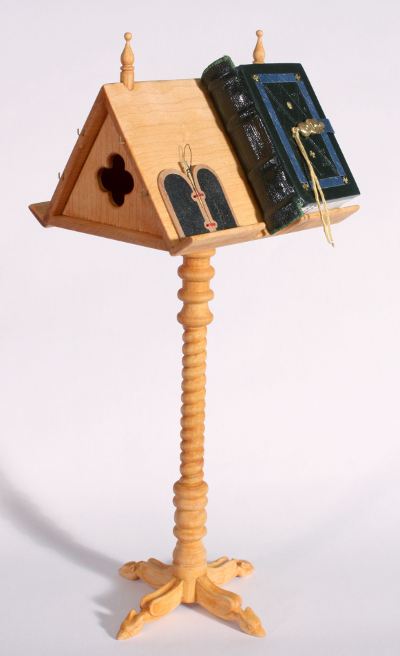
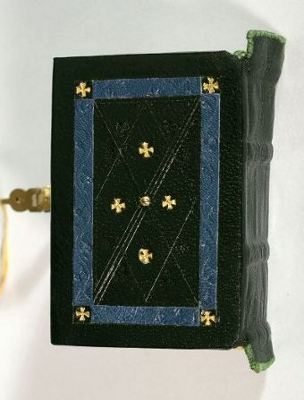
The above is the
finished miniature Bestiary book sitting on a miniature lectern
Book: 2 3/4" high, 210 pages Sold Lectern: 11 1/2" high Sold (includes mini waxed tablet model)
This page is about the materials and methods I used to make a miniature
copy of a medieval Bestiary book. This book is
an "Art Book", not a true facsimile. The binding is not like the
binding of the original book, however the structure is authentic
Romanesque, of the period when the original book was written. It has
been enhanced from that point of departure with inlaid leather, and
other minor differences. The price reflects the amount of work and time
involved in creating this unique artwork. It was all hand crafted.
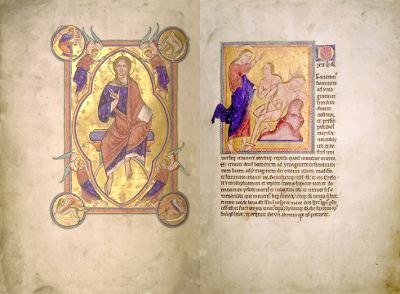 A spread of the pages after heavy digital enhancement by the artist to restore the proper look, but before the artist has hand-painted the gold color. A Bestiary is a collection of stories about animals and mythological creatures, told in a context that relates them to Christian theology. This miniature book is my version of the Aberdeen Bestiary. My book was printed with archival inks at 1440 dpi. Not including the end-tabs, it stands 2.75 inches high. This book has 210 pages. Each of the 97 illustrations and 143 gilded initials throughout the book have been painstakingly hand-painted with gold colored paint in tiny detail. The original had genuine gold leaf, but it would not have been possible to gild them on this reduced scale and preserve the detail. My book is bound using a historical 12th century Romanesque technique. 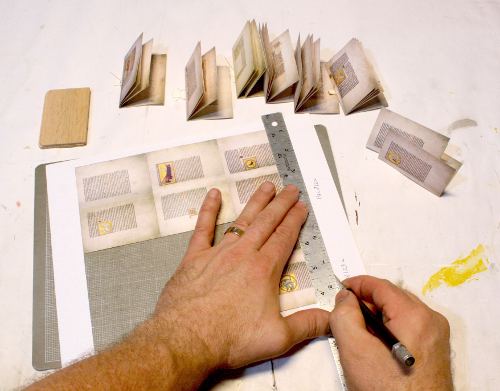 Cutting the printed bifolia and checking the registration.
Each bifolium had to be stacked in the proper order, sewing holes
pricked through the gutter, and the gatherings
had to be labeled by adding tackets with tags. The process of working
over the digital files, printing, reprinting rejected pages, cutting
and hand-painting the gold color took over two weeks of long days and
late nights.
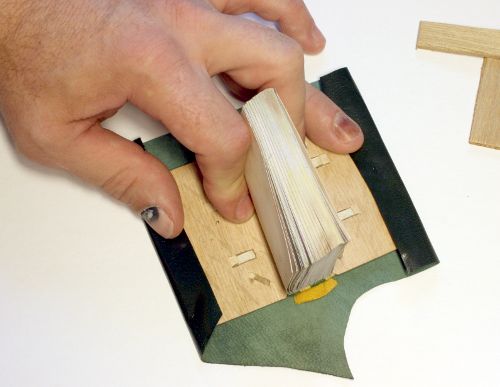
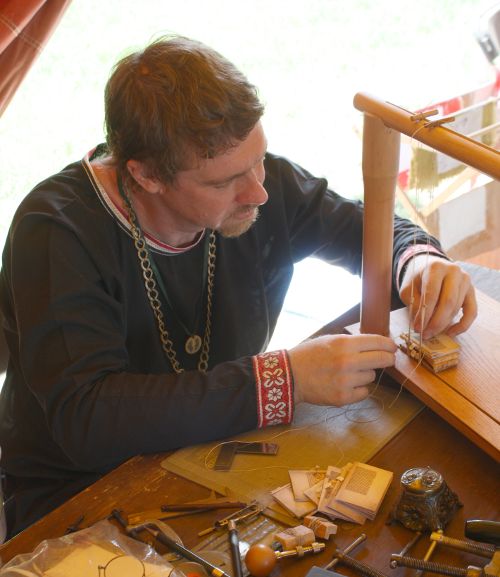 Sewing the book block
I sewed the book as a demonstration at a medieval reenactment event. The work is being done on a 12th c. type of sewing frame.
The Romanesque period is the first time such frames were used to sew
books.
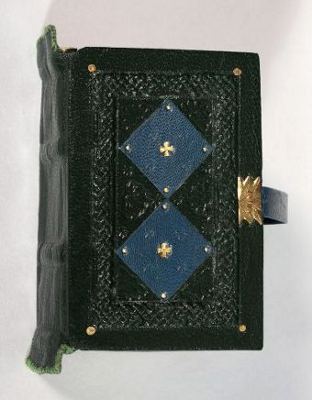
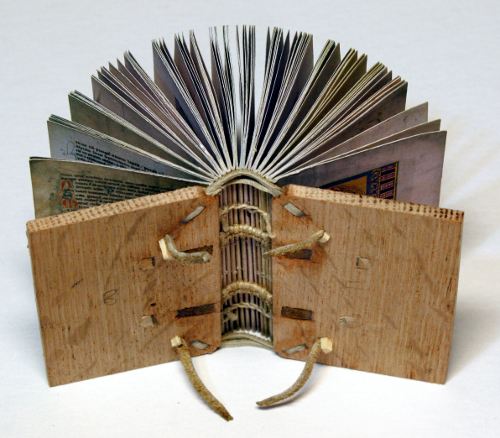 The leather sewing support thongs are laced through very carefully cut holes and channels. To preserve the scale, I planed the boards quite thin. Each strap has been split to make double thongs. The pages were sewn by hand to leather bands called "sewing supports" and "endbands" at top and bottom. These in turn were laced through hand hewn holes and channels cut through quarter sawn oak boards that I planed down to just a touch over 3 mm. The leather bands were then secured with wooden pegs and trimmed.  Making the knotwork border I went overboard with a design for the cover. The Stonyhurst Gospels (Gospels of St. John) had a raised design in the later 7th century. I though "Hey, anybody can tool a design down into leather, but I have thin miniature book leather, so maybe I can tool it... upwards!" - heh, heh, I knew it would be tricky, but I had no idea what a major difficulty I was getting into. The S-H Gospels had a very simple design, and it was a larger book. So of course I had to do something incredibly complex and small. I decided to do a design with actually interlacing lines. I figured I would draw a template, a really accurate grid, on paper, and then place pins for winding around. I drew the grid and divided it into knots with walls and long runs of line. Each line had four over and under passes from one side to the other. I soon discovered that the hemp sewing thread I wanted to use was too thick and I had to go with the linen thread to fit between the pins. Then I started threading it, and that's when the frustration and nightmares began. Yes, I missed some over and unders, but that is to be expected, and I fixed them later after finishing the knots, soaking in adhesive, and then pulling the pins. I went through several adhesives before finding one that worked right. When it was done I glued the thread knots to the front cover board. I won't go into details, but I spent about 3 days on this design element. The next time I'll use a different method. 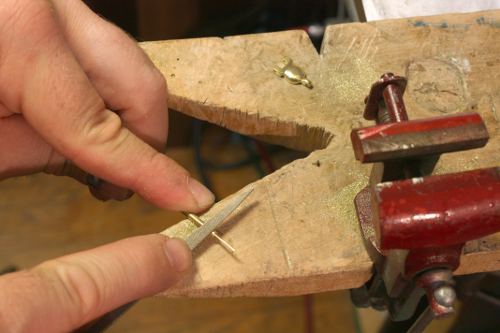 Carving the Hasp Pin The Romanesque book comes from a time when parchment was used for the pages. Parchment swells with moisture, so clasps were used to keep the book closed tightly when not in use. In a Romanesque book the hasp would be on the end of a long strap that would come from the front cover on most English books, and it would wrap around to the back and hook over a pin that protruded from the board. It was anchored on the other end with a metal plate. 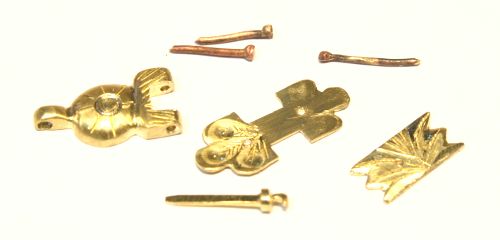 Brass hardware 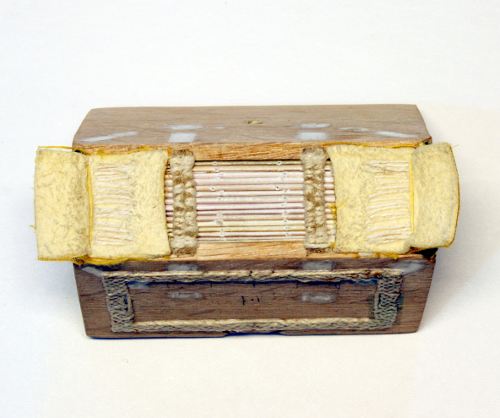 The uncovered spine with lining
The spine is lined at top and bottom with chamois leather to pad it,
and the chamois is faced on the inside with yellow silk fabric. The
hand-sewn double endbands are
structural, being laced through the boards and pegged before being
wrapped in green and yellow silk thread. Rising past them are
rectangular end-tabs.
 The leather covering 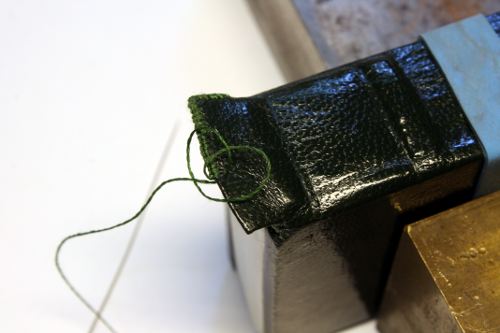 The end-tabs were then stitched to the leather covering. The strap is ultra thin skived blue leather wrapped around a parchment core. The covering leather was tooled, inlayed with blue leather, and gilded with genuine gold accents.  Pasting down the endleaves The
Lectern
Here are a few pictures of making the lectern. I spent quite a while looking up different medieval lecterns of different ages to see what they had in common vs. how they differed. There was a tremendous amount of variation, as is true with medieval furniture in general. I chose blonde woods. The top is all maple, but I could not get maple dowels for the column, so I ended up having to stain it to make them match. 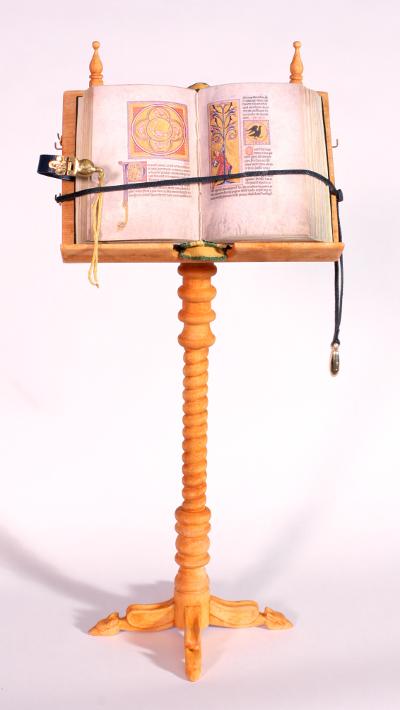 The lectern holding the miniature Aberdeen Bestiary
Some interesting features seem to distinguish the lectern from a
regular writing slope. One is the pronounced slot on the base board
holding the book. I'm not sure of the reason for it, but some books had
enlarged protruding end-tabs, so maybe it was to accomodate them.
Another feature I picked-up from an illustration of a choral lectern in
the Olivetan Gradual (15th century) was the hooks and strap arrangement
to hold the book open. Normally I see a pair of straps with weights
hung vertically over the top. One strap held each side of the book, but
the Olivetan example had two horizontal straps with a ring on one end
and a weight on the other. Since a miniature book lacks the weight to
hold itself open, I elected the Olivetan example as the best solution
for display.
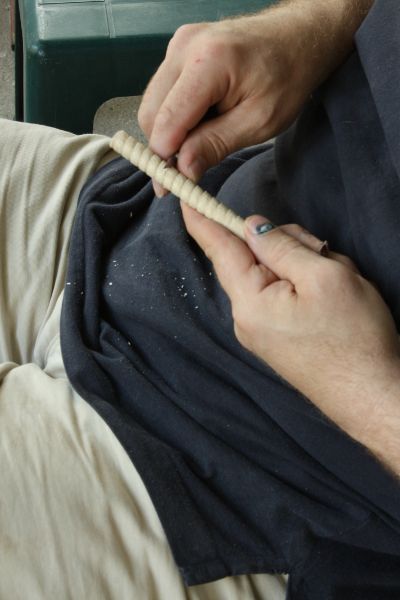 Carving the spiral of the column
The column post needed to be made using two different methods. There is
a long spiral in the middle, and that cannot be turned on a lathe. So I
had to carve it the old fashioned way. I sat on the porch one evening
and whittled it from a hardwood dowel.
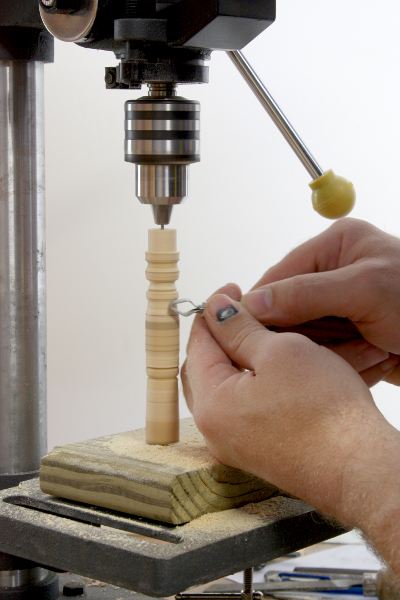 Turning the column top and bottom
The top and bottom of the column needed to be turned on a lathe.
However, I don't have a lathe. So the next best thing was to jury rig
the equivalent using my drill press. Unfortunately, I didn't pick up
that fancy set of antique chisels for this purpose when I saw them at
the antique mall, so I had to make due with X-Acto tools and wood rasps
& files. Well, not a fast process, but it worked. I then cut the
pieces in two so I could insert the spiral between them.
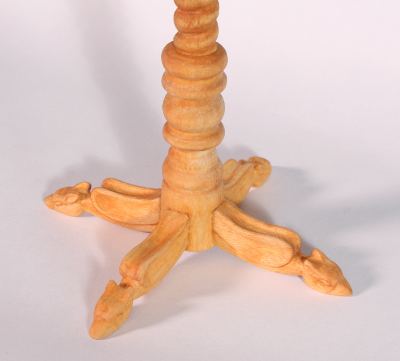 The base of the
lectern
I carved the base out of maple. It was going to just have early
gothic style animal heads for the feet, but then I got inspired and
carved griffins. Again, the process was whittling.
 Here is the final lectern
The lectern seemed like it needed one more thing to kick it over the
top. So I decided it would have a miniature waxed tablet model to go
with it. The tablet is two very thin boards, so thin in fact that the
boards are only as thick as the recess for the wax in a real waxed
tablet, about 1mm thick. For that reason, the tablet could not have
real wax applied. However, it does come complete with a 24mm hand made
brass stylus, and the artwork is signed on the tablet where one would
normally write.
I am also currently writing a book on how to make a medieval book, entitled: "Secrets Of Forgotten Masters: A 21st Century Artist's Exploration of how books were made in the Middle Ages". That book will be a comprehensive visual exploration of the materials and techniques used by medieval artists and craftsmen to produce entire books. It will feature sections on tool making, materials collection and manufacture, color making, and binding. Each section will be fully illustrated with photographs. The information will be documented from extant sources and treatises from the medieval period and researched by using hands-on experimentation. |
|
The Miniature Aberdeen Bestiary Book Binding Art, lectern, and photos are Copyright 2012 Randy Asplund |