
Yokosuka MXY7 Ohka (Cherry Blossom) and MXY7-K1 Ohka Trainer
© Randy Asplund
|
The Trainer is scratch built from wood, plastic and Bondo
The Ohka was essentially a flying
bomb with a pilot. This was the final operational phase of the
Japanese Kamikaze in the Second World War. It was small, just
under 20' in length, and was launched from the belly of a Mitsubishi
G4M2e "Betty" bomber. After being dropped, it would
glide the greater distance towards the target ship, and then the
pilot would ignite 3 rocket motors for less than ten seconds of
burn in order to make it a very fast moving target as it approached
the ships. Although several effective hits by Ohkas were scored,
a great number were shot down while still attached to their mother
planes because the bomber had to get fairly close to the defended
zone around the ships prior to launch.
The trainer version was a glider, and thus had no bomb and no motors. The tail was fared over, and a landing skid was attached beneath the fuselage. The model I built was based on the example on display at the Wright Patterson AFB Museum in Dayton Ohio. It was modified after looking at photos of the same type taken at the end of the war. The following is a look at how I built these two models. The operational version was created from a test casting in resin that a friend of mine made for his own use. I used it for measurements, but it had a lot of problems. It was skewed, had big holes, and the sections of the mold hadn't matched up. It required a lot of work. 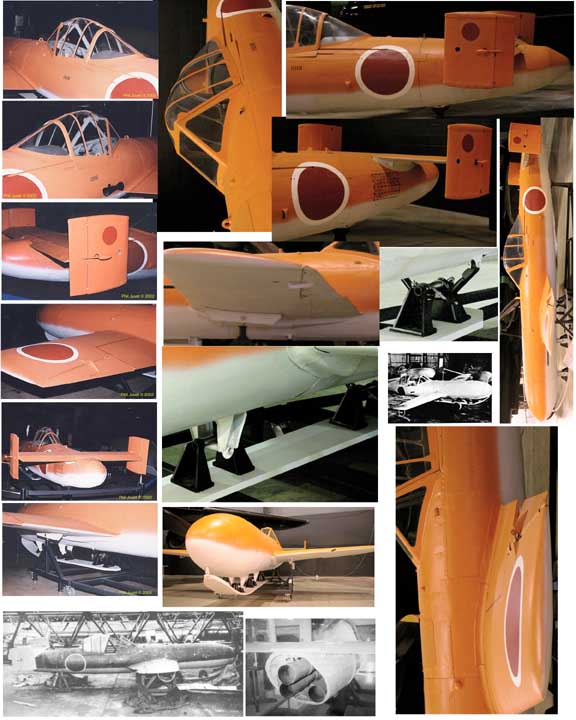 The first thing to do when building a model is to assemble reference photos. These were captured on line and I shot many of them myself from the actual aircraft on display in the museum. This is just one page, but I have many other views. 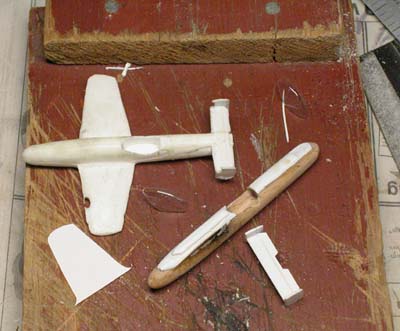 I needed to have clear canopies, and I decided that if I was going to do that, I might as well build the cockpits and add pilots. I cut off the original canopy and then used it to drop form a couple of new ones from very thin clear plastic sheet. The wings were made of two sheets of plastic laminated together and then sanded and filed until the proper airfoil shape was achieved. More sheet to make the tail surfaces and to build up the oval of the fuselage. I started with a wood dowel of a diameter that matched the fuselage diameter of the original. I used a dremel tool to dig out the cockpits. 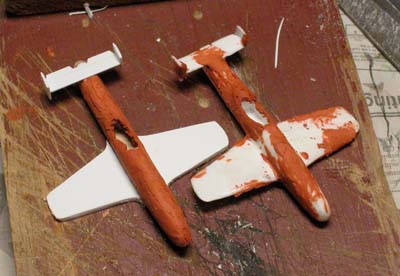 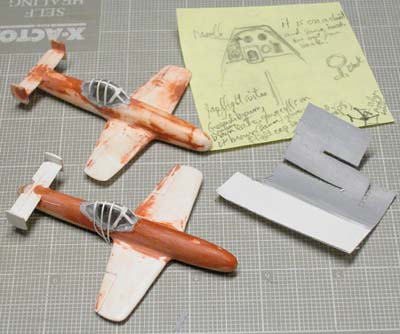 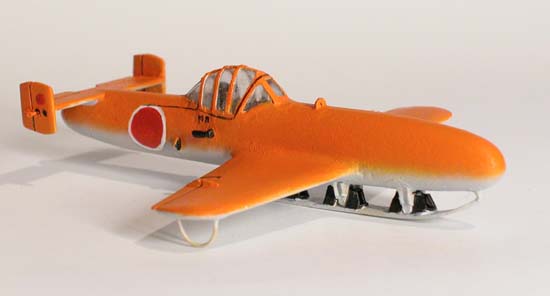 Here is the final close up of the trainer version. The skid had to be made from some very complicated pieces. These were little 3 sides trapezoids on bases that attached to connecting bars. They were hard to make on this scale, but the look was worth it. I didn't do the best job, but considering how small the parts were, I am not complaining. I also had to make control linkages, air speed indicator, control surface balance weights, and finish with the hoop skids that protect the wing tips. Not my best paint job on the national emblem, but I will fix that later.remember, this thing could fit in the palm of your hand. |